Creating a website using WordPress is a relatively easy process. Here are the steps to create a website using WordPress:
Choose a hosting provider: The first step is to choose a web hosting provider. A web host provides the server where your website files will be stored and makes them accessible on the internet. Some popular hosting providers include Bluehost, SiteGround, and HostGator.

There are many web hosting providers available, and the best one for you will depend on your specific needs and budget. Here are some popular hosting providers that you can consider:
Bluehost: Bluehost is one of the most popular hosting providers, and it is recommended by WordPress. They offer one-click WordPress installation, a free domain name, and 24/7 support.
SiteGround: SiteGround is another popular hosting provider that offers excellent performance and security features. They offer one-click WordPress installation, a free SSL certificate, and daily backups.
HostGator: HostGator is a budget-friendly hosting provider that offers unlimited disk space, bandwidth, and email accounts. They offer one-click WordPress installation and a 45-day money-back guarantee.
WP Engine: WP Engine is a managed WordPress hosting provider that offers excellent performance and security features. They offer automatic updates, daily backups, and 24/7 support.
DreamHost: DreamHost is a reliable hosting provider that offers fast performance and excellent customer support. They offer one-click WordPress installation, a free domain name, and unlimited traffic.
When choosing a hosting provider, it is important to consider factors such as pricing, uptime, customer support, and security features. You should also consider the scalability of the hosting provider in case your website grows in the future.
Install WordPress: Most hosting providers offer a one-click installation of WordPress. This means you can easily install WordPress without needing any technical knowledge. Once you have installed WordPress, you can access the WordPress dashboard.

To install WordPress, you can follow these steps:
Choose a web hosting provider that supports WordPress. Most web hosts support WordPress, and many of them offer a one-click installation process.
Log in to your web hosting account and navigate to the control panel. Depending on your web host, this may be called cPanel, Plesk, or another name.
Look for the “Softaculous” or “Installatron” icon, which are popular tools for installing WordPress. Click on the icon to launch the installation process.
Select “WordPress” from the list of applications that are available for installation. This should bring up a screen with information about the software.
Click on the “Install” button to start the installation process. You will be prompted to choose the domain name and directory where you want to install WordPress. You can leave the directory field blank to install WordPress in the root directory of your domain.
Fill in the details for your website, such as the site name, username, and password. You can also choose a language and select a theme.
Click on the “Install” button to start the installation process. Once the installation is complete, you should see a message confirming that WordPress has been installed.
You can then log in to your WordPress dashboard by going to your domain name and adding “/wp-admin” to the end of the URL. For example, if your domain is “example.com”, you would go to “example.com/wp-admin”.
That’s it! You have successfully installed WordPress on your website.
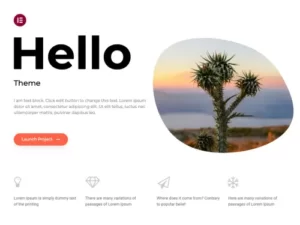
Choose a theme: A theme determines the look and feel of your website. WordPress comes with several free themes, and you can also purchase premium themes from third-party websites.

Choosing a theme is an important step in building a website with WordPress. A theme determines the look and feel of your website, and it can impact the user experience. Here are some factors to consider when choosing a WordPress theme:
Design: Choose a design that matches your brand and appeals to your target audience. Look for a theme with a clean and professional design that is easy to navigate.
Features: Consider the features that you need for your website. Some themes offer more features than others, such as custom widgets, page templates, and custom post types.
Customization: Choose a theme that is easy to customize. Look for a theme with a built-in theme customizer that allows you to change colors, fonts, and other settings without needing to code.
Compatibility: Make sure the theme is compatible with the latest version of WordPress and popular plugins. This ensures that your website will be secure and functional.
Support: Look for a theme that has good support. Choose a theme that has an active community and a support forum or documentation to help you with any issues.
Some popular places to find WordPress themes include:
WordPress.org: WordPress.org offers thousands of free themes that you can browse and install directly from the WordPress dashboard.
ThemeForest: ThemeForest is a marketplace that offers premium WordPress themes. You can browse themes by category and see user ratings and reviews.
StudioPress: StudioPress is a popular provider of premium WordPress themes that are designed for speed and security.
Elegant Themes: Elegant Themes offers a collection of premium WordPress themes and plugins, including the popular Divi theme.
When choosing a theme, it is important to consider your specific needs and budget. Choose a theme that fits your brand and helps you achieve your website goals.
Install plugins: Plugins add functionality to your website. There are thousands of free and premium WordPress plugins available. Some popular plugins include Yoast SEO, Contact Form 7, and Jetpack.

Plugins are a powerful feature of WordPress that allows you to add new functionality to your website. Here’s how to install plugins on your WordPress website:
Log in to your WordPress dashboard and navigate to the “Plugins” section.
Click on the “Add New” button at the top of the page. This will take you to the WordPress Plugin Repository, where you can browse and search for plugins.
Use the search bar to find the plugin that you want to install. You can also browse plugins by category or popular tags.
Once you’ve found the plugin that you want to install, click on the “Install Now” button. WordPress will download and install the plugin automatically.
After the plugin has been installed, click on the “Activate” button to activate the plugin. Some plugins may require additional setup or configuration, so be sure to read the documentation or instructions that come with the plugin.
Alternatively, you can also install plugins manually by downloading the plugin files and uploading them to your website via FTP. Here’s how:
Download the plugin files from the plugin’s website or from the WordPress Plugin Repository.
Extract the files and save them to your computer.
Connect to your website via FTP and navigate to the “wp-content/plugins” directory.
Create a new folder with the name of the plugin and upload the extracted plugin files to that folder.
Log in to your WordPress dashboard and navigate to the “Plugins” section. You should see the newly uploaded plugin in the list of available plugins.
Click on the “Activate” button to activate the plugin. Some plugins may require additional setup or configuration, so be sure to read the documentation or instructions that come with the plugin.
That’s it! You have successfully installed a plugin on your WordPress website. Remember to only install plugins from trusted sources and keep your plugins updated to ensure your website remains secure and functional.
Customize your website: Once you have installed a theme and plugins, you can start customizing your website. You can create pages, add content, and configure settings.

Customizing your website is an important part of creating a unique and professional online presence. With WordPress, you can easily customize your website using themes, plugins, and built-in customization tools. Here are some steps to customize your website:
Choose a theme: As I mentioned earlier, choosing the right theme is important for the look and feel of your website. You can customize your theme by changing colors, fonts, layout, and other settings using the built-in theme customizer.
Install plugins: Plugins can add new functionality to your website, such as social media sharing, contact forms, e-commerce, and more. Install and configure plugins to meet your website’s specific needs.
Create and publish content: Add pages and blog posts to your website to showcase your content. Use the WordPress editor to format text, add images and videos, and create links.
Add widgets and menus: Widgets are small content blocks that can be added to your website’s sidebar, footer, or other areas. Menus allow you to create navigation links to different parts of your website. Use the WordPress customizer to add and customize widgets and menus.
Set up site identity: Customize your website’s identity by adding a logo, tagline, and favicon. You can do this in the WordPress customizer under the “Site Identity” section.
Add pages to your site: Create pages such as an “About Us” page or “Contact” page, which will allow your visitors to learn more about your website and connect with you.
Configure your website settings: Configure your website settings such as your site title, tagline, and permalinks in the WordPress dashboard under the “Settings” section.
Remember to preview your changes before publishing them to your website. This will ensure that your website looks and functions as you intended. With these steps, you can customize your WordPress website to fit your unique needs and preferences.
Launch your website: When you are ready, you can launch your website. You will need to connect your domain name to your web host and update your DNS records. Once your DNS records have propagated, your website will be accessible on the internet.

Congratulations! You’ve created and customized your WordPress website, and now it’s time to launch it. Here are some steps to follow to launch your website:
Choose a domain name: If you haven’t already, choose a domain name that is unique, easy to remember, and relevant to your website’s content.
Point your domain name to your hosting provider: To launch your website, you need to point your domain name to your hosting provider. This is usually done through your domain registrar’s control panel by updating the domain’s DNS records to match your hosting provider’s nameservers.
Set up SSL: SSL (Secure Sockets Layer) is a protocol that encrypts data between your website and its visitors, making it more secure. Many hosting providers offer free SSL certificates through Let’s Encrypt, which can be installed easily through your hosting provider’s control panel.
Test your website: Before launching your website, make sure to test it thoroughly to ensure that everything is working as expected. Check for broken links, missing images, and other issues.
Launch your website: Once you’re confident that everything is working as it should, it’s time to launch your website! You can do this by making your website live on your hosting provider. Be sure to double-check that your domain is pointing to the correct location, and that your SSL certificate is properly installed.
Share your website: Finally, share your website with the world! Promote it on social media, share it with friends and family, and start building your online presence.
Launching a website can be an exciting and rewarding experience. By following these steps, you can successfully launch your WordPress website and start sharing your content with the world.
These are the basic steps to create a website using WordPress. However, you may need to do additional customization depending on your requirements.


